Omni monochrome, e.g. ST2
- Switch on the Stromer and call up the selection page where the menu is listed.
- Pull the right brake lever, press the menu, release the brake lever after approx. 2 seconds.
- Scroll down with the arrow on the right until "System" appears
- Press System, "System and Service" appears
- Press Service, "Service" appears
- Press Service, the following entries appear: "SIT ENABEL", "TMM RESET", "DL AUTONOM" (depending on the firmware version)
DL is the daytime running light, which is set to OFF in the factory setting.
When ON, it switches on automatically when the ST2 is switched on, without
that you have to switch on the main light.
Link with pictures
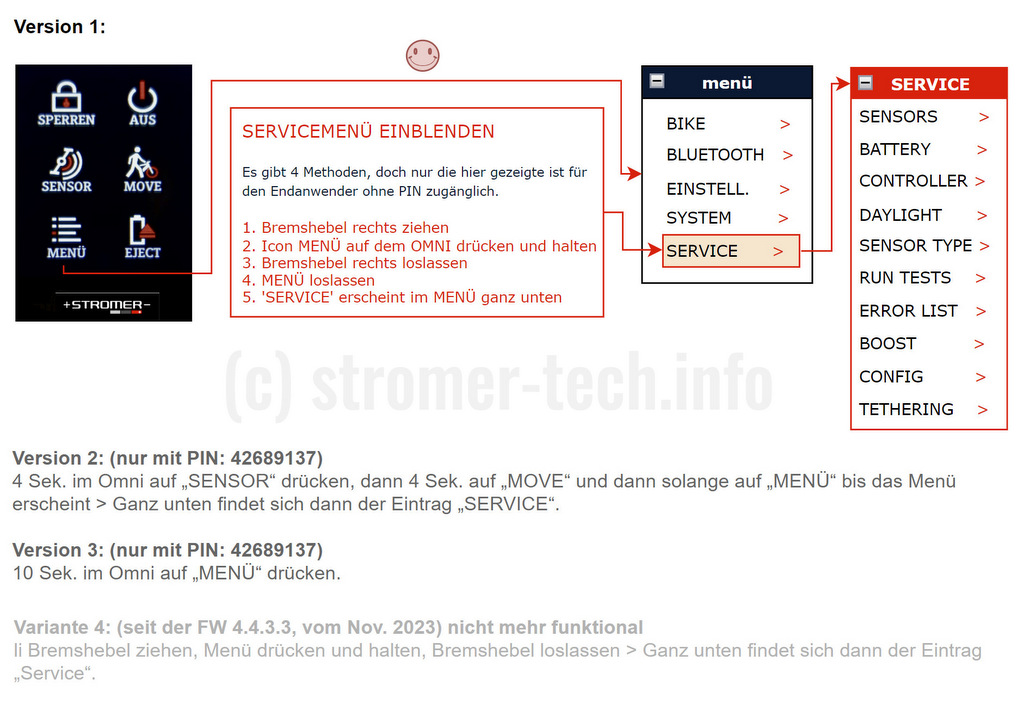
Omni C
There are 4 methods, but only the one shown here is accessible to the end user without a PIN.
- Switch on the Stromer, wait until the Omni has started
- Pull brake lever right
- Tap and hold the MENU icon on the OMNI
- Release the brake lever on the right
- Release MENU
- 'SERVICE' now appears at the bottom of the MENU

Service menu cannot be reached
A contact in the right-hand brake lever controls recuperation, the brake light and the route to the service menu. If the contact or the wiring is faulty, the service menu cannot be accessed or can only be accessed with a PIN.
As the brake lever switches control the rear brake light, their function can also be checked visually. If the brake light does not light up when the right-hand lever is pulled, there is a defect in the switch or the wiring.