
ST3 / ST5
Removing the battery compartment is a bit of a fiddle. The Screw plan The illustrated screws must be removed. Once the screws are removed, you can try to pull the compartment on the top left out of the frame. A thin spatula can be used to help, so the compartment doesn't stick to the frame. Once the compartment on the top left is slightly pulled out, you can release it from the frame at the bottom by the charging lid and slide it upwards with small rocking movements.
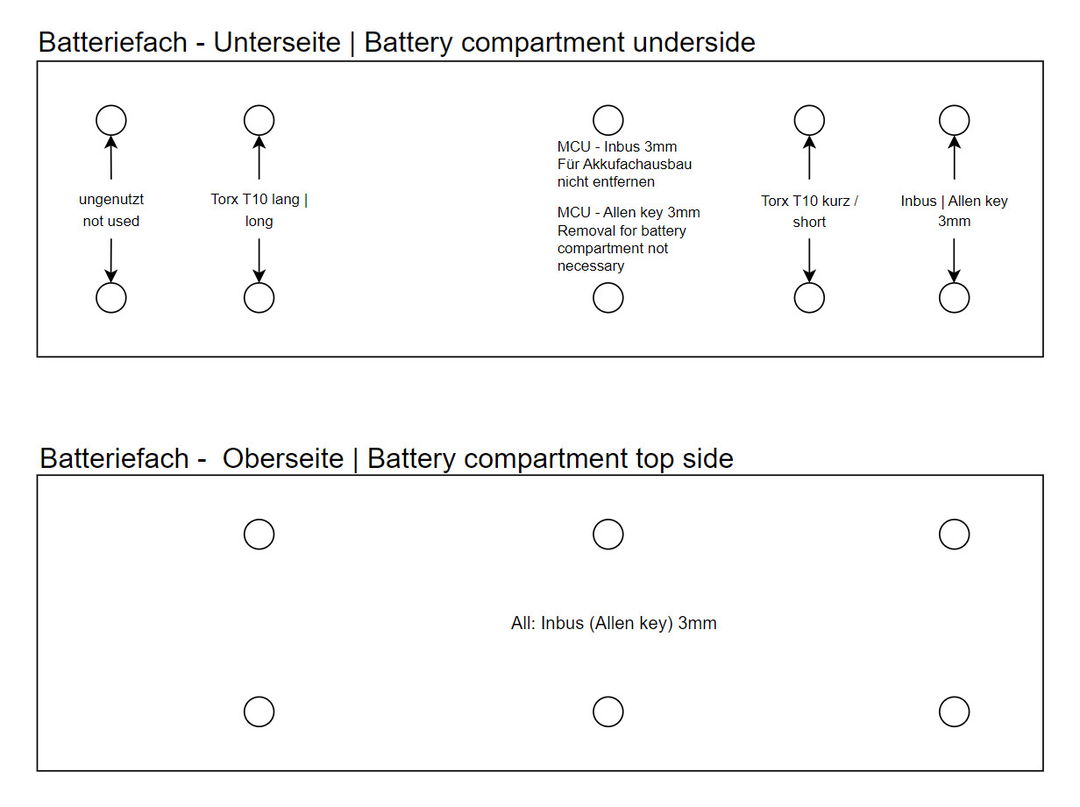
When reassembling, make sure that:
- the screws should only be tightened by hand so that they do not punch through the battery compartment.
- the wicket cable behind the battery compartment is positioned in the bottom bracket shell in such a way that it does not pull the base at an angle.
To remove the controller under the down tube, the two 3mm Allen screws labeled „MCU“ must also be removed. Additionally, the down tube cover with its two Allen screws must be loosened below the horn.
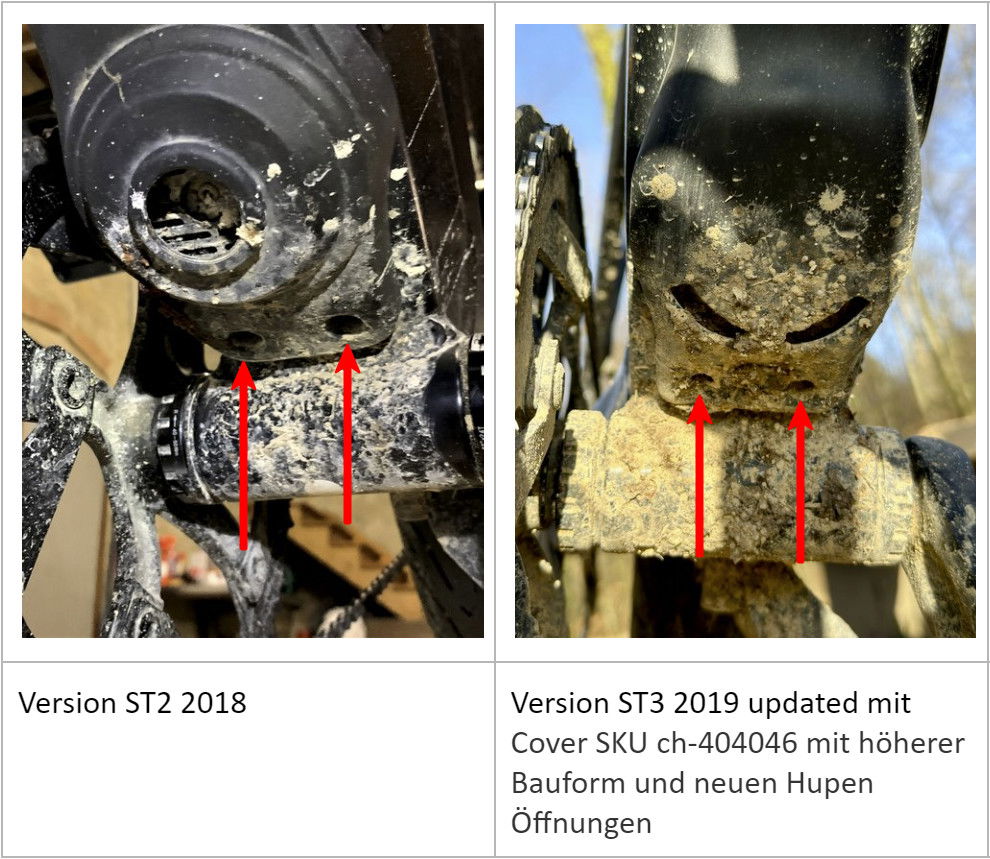
ST1 / ST2 Belt / ST7
On some Stromer models, the controller and distribution board are integrated into the battery compartment. The charging flap, for example on the ST1 / ST2 Belt, can be removed via a 4 mm Allen screw on the underside of the down tube. To access the controller or distribution board, simply remove the four screws inside the compartment.
Hallo, mijn Stromer 983 Wh accu heeft drie schroeven en laadt op tot 64%, maar geeft vervolgens foutcode W210100 weer. Kunt u deze repareren? Wat zijn de kosten?
Hi Jawo
Wir sind kein Akkuaufbereiter sondern eine Wissensdatenbank für Stromer S-Pedelecs.
Informationen zu Refurbisher, welche deinen Akku mit neuen Zellen ausstatten, sowie den SOH und Ladezyklenzähler zurücksetzen können, findest du unter diesem Link.
W 210100 ist eine Warnmeldung. Ursache kann die Verwendung der Rekuperation oder ein Problem mit dem Akku sein. Meistens liegt eine CELL DRIFT vor. Teste den Akku mit dem im Omni eingebauten SELF_CHECk um nähere Infos zum Akku zu erhalten.
Greetings from Stromer
Admin